UGC Tools
Publish panel
Open Tools → VR Realms Workshop. Pick map or avatar:
- Validates instantly: green READY / amber FIXABLE / red INCOMPATIBLE
- Auto-fixes folders and avatar skeletons
- Cooks, packages, uploads to Steam
Create assets anywhere, including store packs and random folders. The tool moves referenced content into the item folder. Item list / markers and scripting API are covered in their guides.

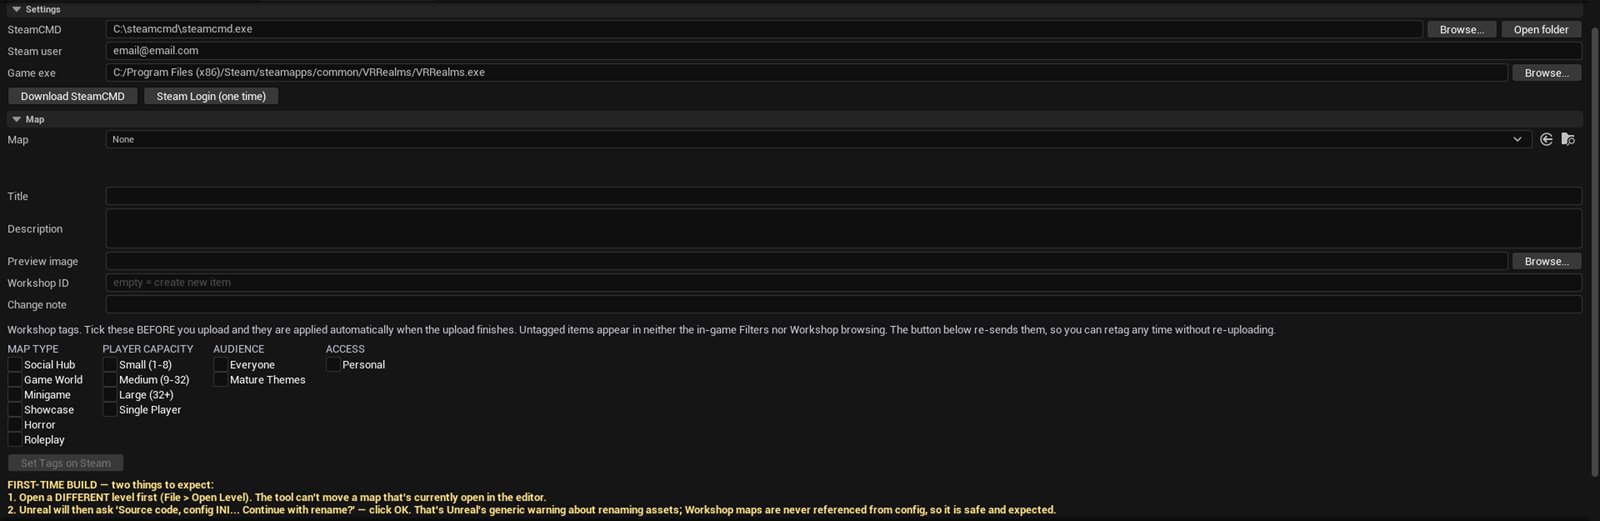
Title, description, preview and Workshop ID belong to the item you picked. Each avatar and each map keeps its own, and they come back when you pick it again. New avatar and New map start with an empty form. If the Workshop ID in the form is also saved with another item of yours, Upload asks before it replaces anything. This is new in Creator Kit 0.4.30: older kits kept the last item’s Workshop ID in the form, so uploading a second avatar could replace the Workshop item of the first.
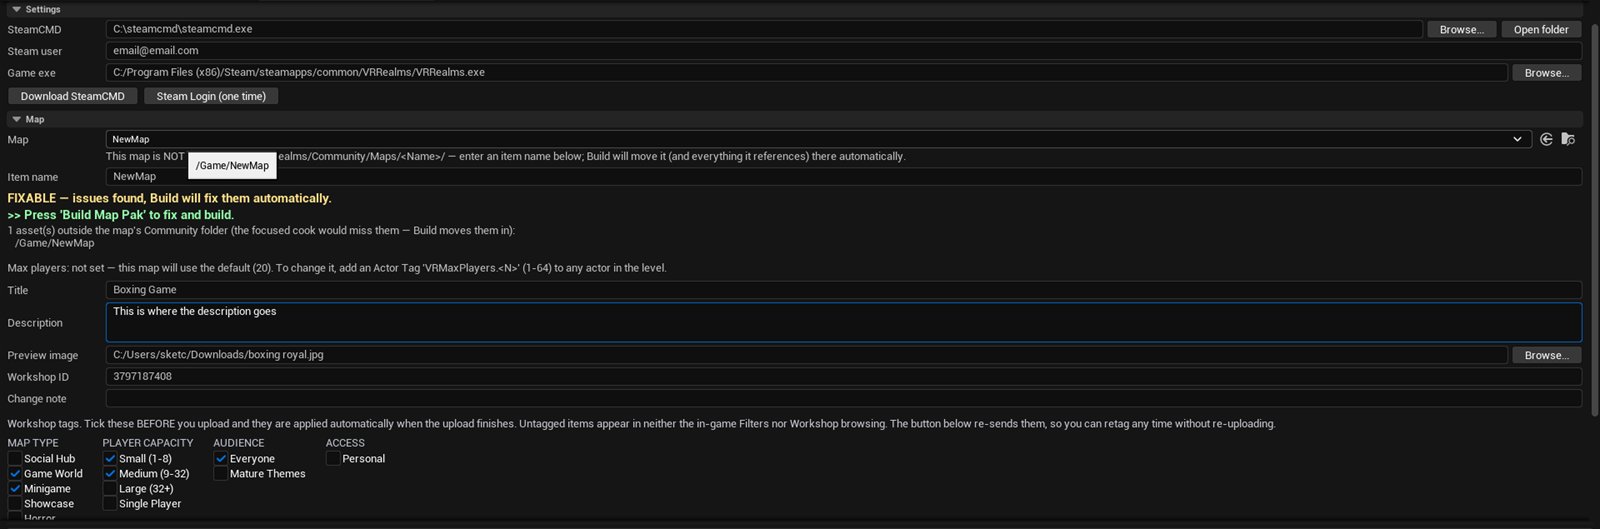
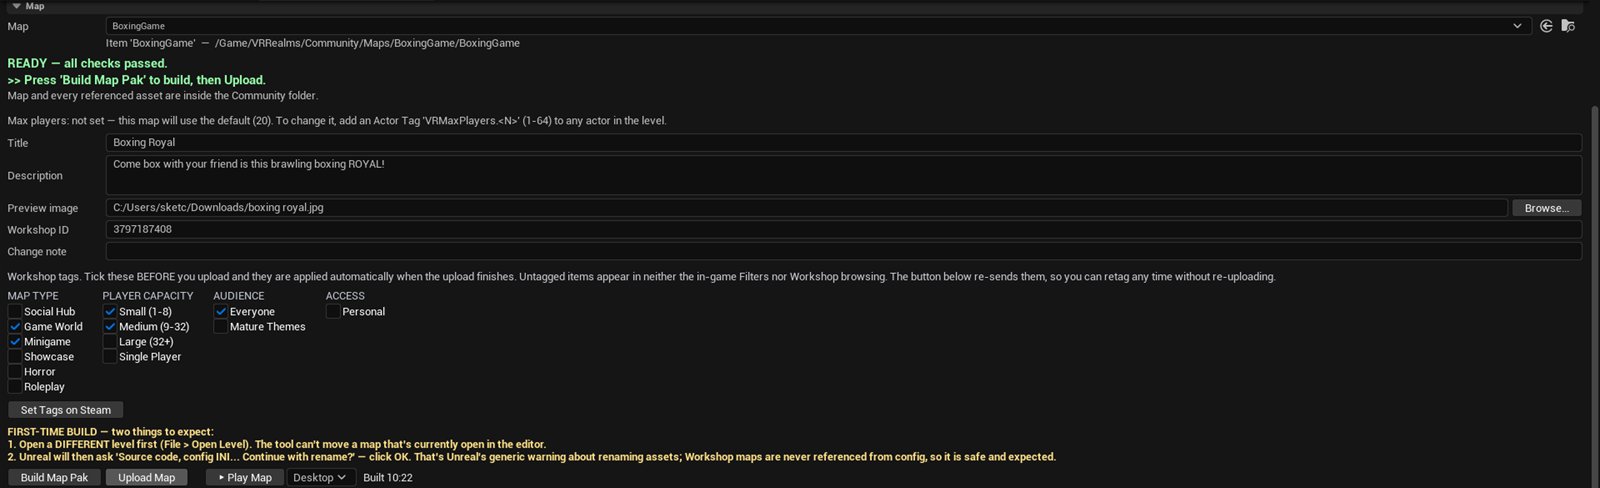
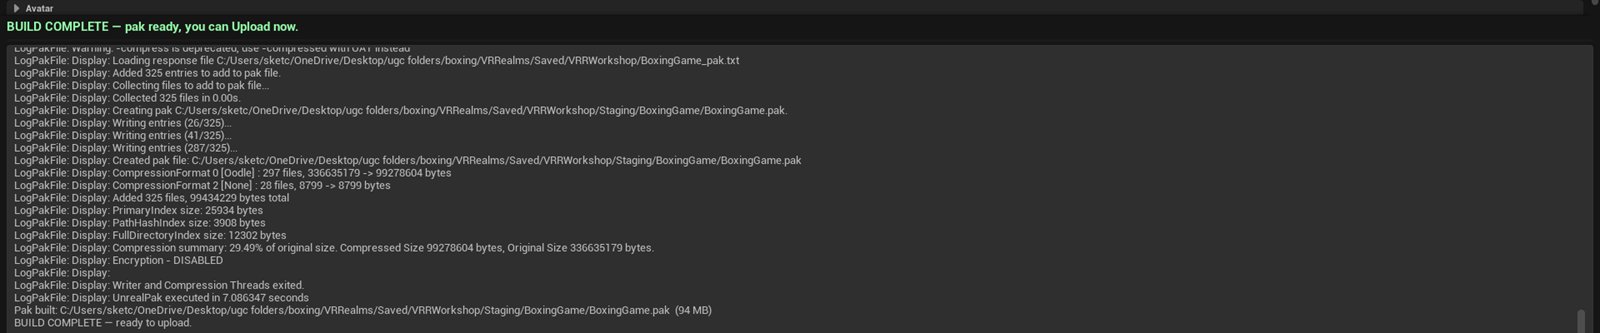
After uploading: set your tags on Steam
Tick your tags in the panel before you upload: Map Type, Player Capacity and Audience for a map, Avatar Style and Audience for an avatar. They are applied through your running Steam client when the upload finishes, so Steam must be open and signed in. If it was not, the log says so; press Set Tags on Steam once you are signed in, or tick them on the item page. The upload log prints the link either way.
It is worth doing straight away, because an untagged item is close to invisible:
- It does not appear under the Filters in the in-game Worlds and Avatars menus.
- It does not appear when players browse the Workshop by category.
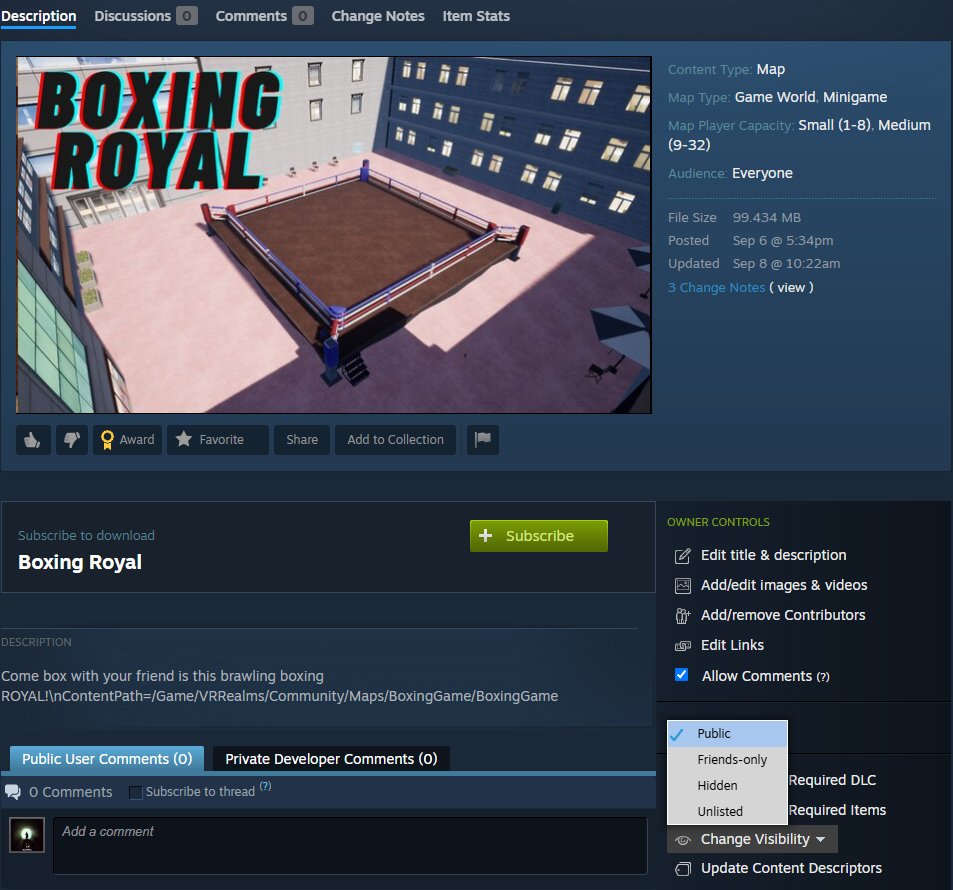
The content type (Map or Avatar) is set for you. The in-game Filters read the rest straight back off Steam, so what you tick is exactly what players filter by. A new item starts Private; switch it to Public under Owner Controls on the item page when you are ready.
Test your map before you upload
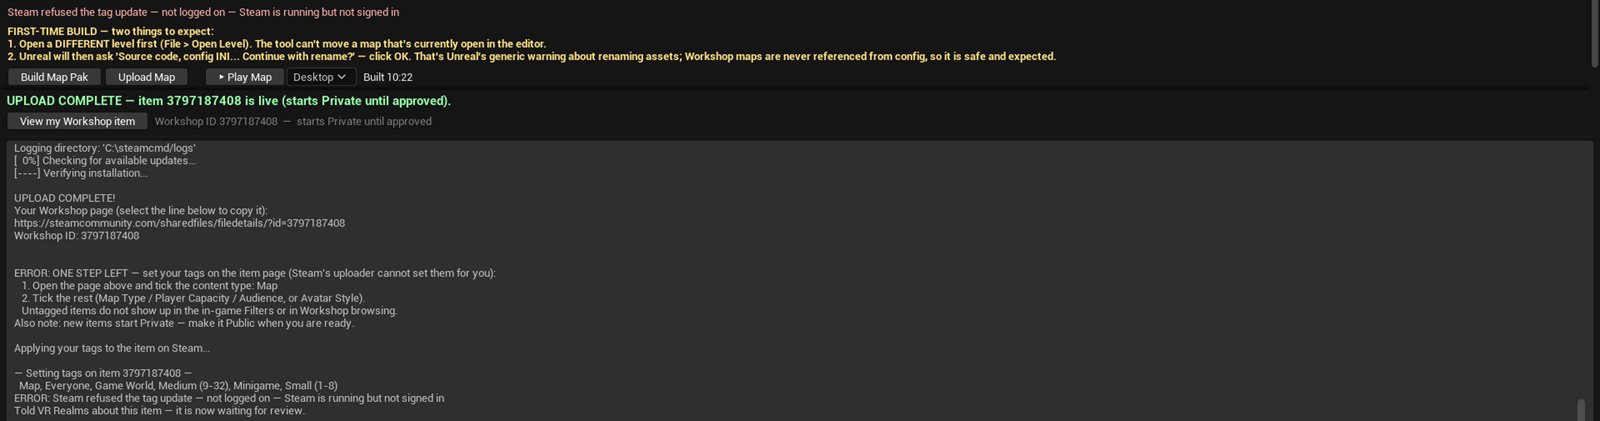
Next to Build and Upload there is a Play Map button. It cooks your map exactly as an upload would, then launches VR Realms straight into it, skipping the intro and the hub. The dropdown beside it chooses VR or Desktop, and the time tells you when the pak it is about to run was built.

Because this is the real game running the real cooked pak, what you see is what players get. A material that would come out grey, or a right eye that would go black in a headset, shows up in seconds instead of after a download. A test launch is offline: it never joins the hub or a session, so nothing half-finished can reach anybody else. You need VR Realms installed from Steam, which is free; the panel finds it for you the first time.
Adding a second player
Once you are in your map, open chat and type /spawn bot 1. A test player appears at one of your spawn points with a name and a score, and the scripting nodes treat it as somebody who just walked in: scoreboards fill up, triggers fire, points land on the right player, and On Player Arrived runs. /spawn bot clear takes them away again.
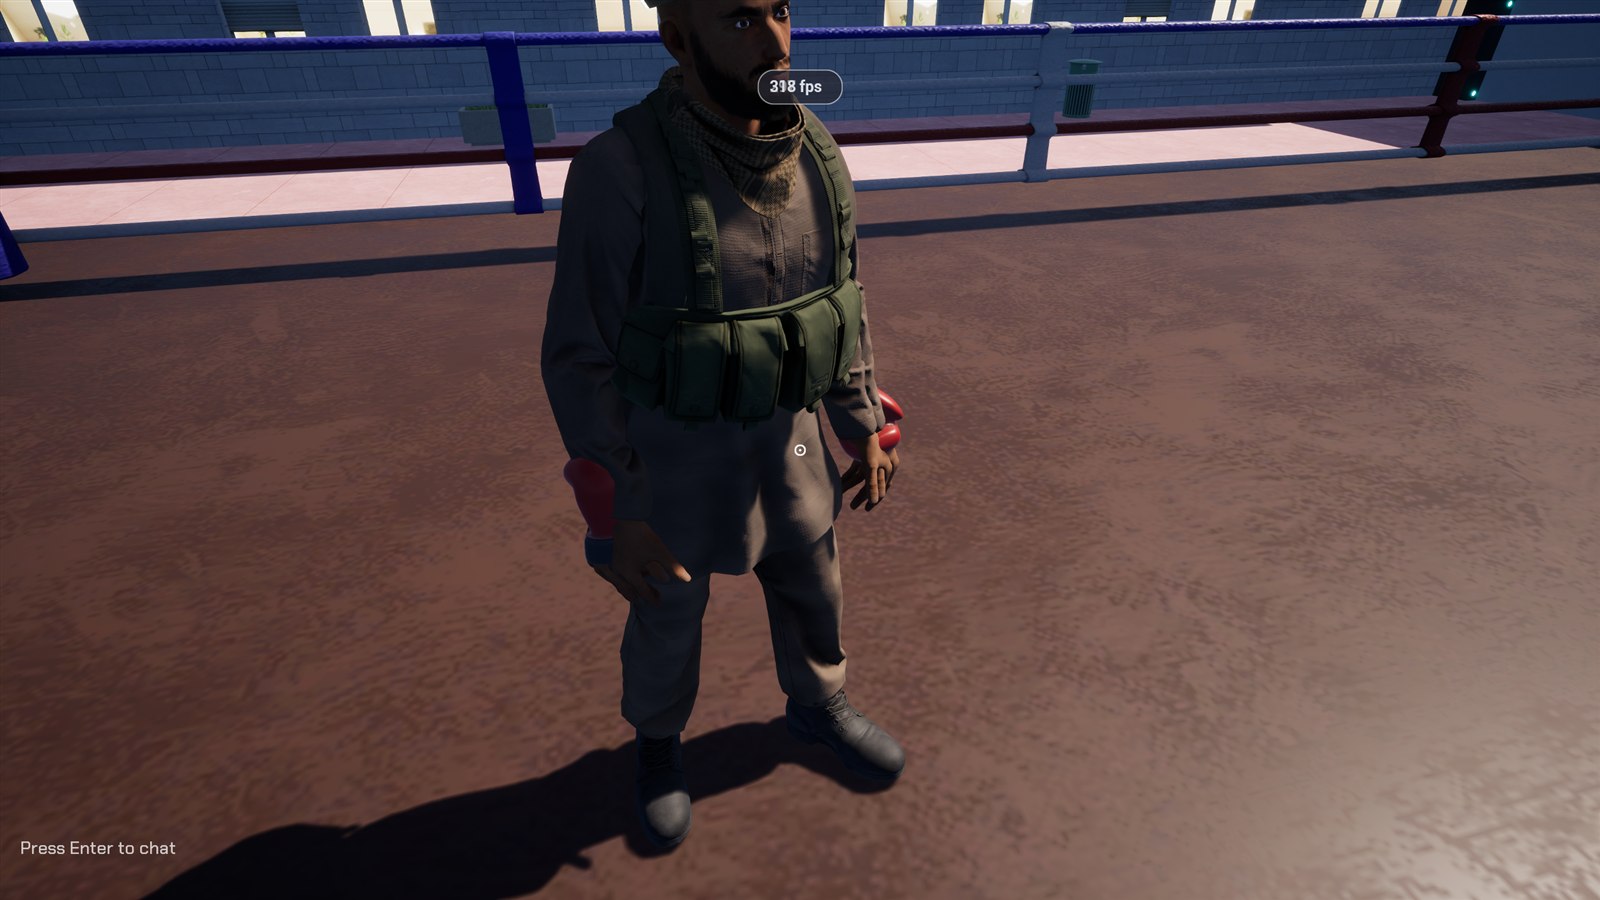
Bots are created by the machine hosting the map, so they will tell you whether your logic copes with more than one player. They cannot prove your map behaves for somebody joining over the network — for that, upload the item as Private or Friends Only and have a friend subscribe to it.
#workshop-support